Image Magick |
Image Magick is a complete command line image editing software, probably the equivalent of Gimp and Adobe Photoshop. Because it does not include heavy editing GUI's, it is lightweight and often included in Linux installs like Sparky Linux. If not, it can be easily installed for Debian based systems by using apt-get:
sudo apt-get install imagemagick.
Image Magick can read, write and convert over 200 image formats; most simple geometrical editors may open 10 to 20 formats. For just this reason, Image Magick is a tool worthwhile including in your image editing arsenal. The purpose of this artical is to illustrate with examples the simpler commands needed to do some of the simple edits that most of us like to do. You have to learn to walk before you can run and this analogy applies to the vast command language for using Image Magick. It is quite amazing what a few simple steps can do.
The language for Image Magick has 2 basic components: commands and options or operators. There are a few basic commands (convert, montage, mogrify, ...), hundreds of options (-size, -border, -frame, ...). Then there is the language, often numbers, that defines the precise nature of the options (-size 500x300, -frame 8, -bordercolor SkyBlue, ...). There is a vast encyclopedia describing how to use the commands and options. The reader should refer to this encyclopedia when he wants to dig deaper on a particular operation. Here we are just going to scratch the surface with some simple commands and options to show beginners that command-line image editing is not as hard as they probably think.
For editing single images, ImageMagick general command line style is
command [options] input-image output-image,
and for multiple images
command [options1] image1 [options2] image2 [options3] output-image.
As a general rule, options1 apply to image1, options2 apply to image2 and options3 applies to output-image, but, depending upon the context, that does not have to be the case, which can add confusion. To minimize this issue, beginners should keep their commands short and separated, that is, achieve edits using several short commands rather than one long command. When multiple operations are used in a command, order is important, as operations will be carried out in the order written. An option is always preceded with "-", for example -geometry, whereas an actual command will not be preceded by anything.
The primary command, especially for simple operations, is convert. We will discuss here commands involving convert, montage (command used when multiple images are combined horizontally and/or vertically), mogrify (command for batch conversions) and the image creating command ' ':' '.
Convert without an option can be used to change image type and/or name:
convert image1.psd image2.jpg.
Convert can be used to creat new images (backgrounds) of any size (in pixels), any image type, for a variety of pre-programmed backgrounds and all colors, which can be specified in hex values or by standardized name. Examples using convert and ' ':' ' to create background images:
A few of the options available for convert and the other commands are -crop -repage -border -frame -trim -chop -draw -annotate -resize -scale -sample -thumbnail -magnify -adaptive-resize -liquid-resize -distort -morpohology -sparse-color -rotate -swirl -implode -wave -flip -flop -transpose -transverse -blur -gaussian-blur -convolve -shadow --radial-blur -motion-blur -sharpen -unsharp -adaptive-sharpen -adaptive-blur -noise -despeckle -median -negate -level -level-color -gamma -auto-level -auto-gamma -sigmoidial-contrast -normalize -linear-stretch -contrast-stretch -colorize -tint -modulate -contrast -equalize -sepia-tone -solarize -recolor -opaque -transparent -colors -map -ordered-dither -random-dither -raise -paint -sketch -charcoal -edge -vignette -emboss -shade -poloroid -encipher -decipher -stegano -evaluate -function -alpha -colorspace -separate. The hard part is getting the correct form for the option description that follows it in the command statement. For example, suppose we want to resize noise.png, which is 30x40 (pixels) and is pictured above in the background creation section. There are 4 correct command syntaxes (depending upon the nature of the resizing) for doing this:
 45 degree rotation but can be any angle
Two very useful options are -geometry and -composite. The -composite option is used to combine images. The -geometry option is useful for size and placement of images. It applies only to the last image preceding its place in the command.
 comp1.jpg |
 comp2.jpg | 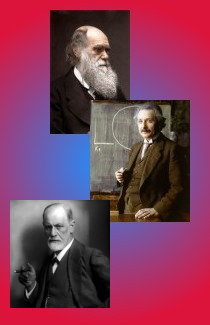 comp3.png |
The -append option can be used with convert to connect images vertically, and +append can be used to connect images horizontally. Of course, we have already illustrated above how composite and convert can be used to connect images in general. So we could use composite here, but generally the append option involves a little less work when the combinations are horizontal and/or vertical. Using the montage command, instead of convert, offers a third alternative which can streamline the process when an array of images are being connected both horizontally and vertically. One of the beauties and difficulties of Image Magick is that there are usually numerous commands that can be used to achieve the same end.
A common task in image editing is attaching names and comments to images. Image Magick has several options (-set label, -title, -label, ...) to add words to images, but, following the maxim of "keeping commands simple", I prefer using -append because it can be used to attach to a given image any kind of information that can be put into the form of an image. The command is very simple:
convert image1.jpg image2.jpg -gravity center -append result.jpg
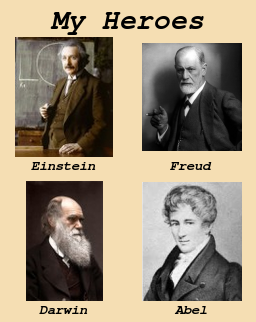
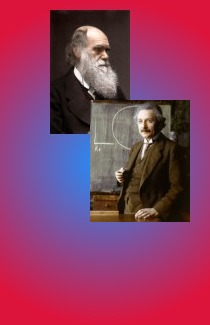
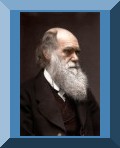
will put image2 below image1 and makes sure they are centered (-gravity center) if different widths. Use -gravity east if you want smaller one aligned right, or -gravity west if you want it aligned left. So attaching information to a given image can be accomplished regardless of the information's content by first creating an image containing that information and then using -append to attach it. Our first example will be a vertical label identifying the individuals in comp3.png.
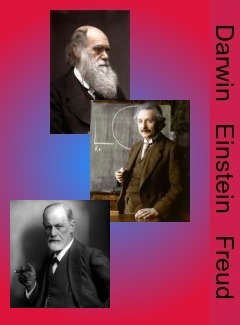
convert comp3.png label1.jpg -append comp7.jpg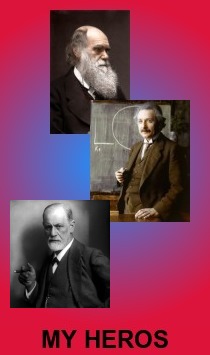 |
convert label1.jpg comp3.png -append comp8.jpg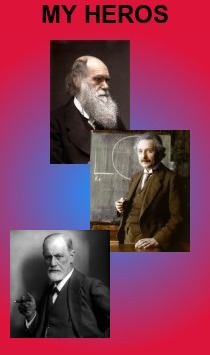
|
convert -resize x355 label4.jpg label5.jpg convert comp8.jpg label5.jpg +append comp9.jpg  |
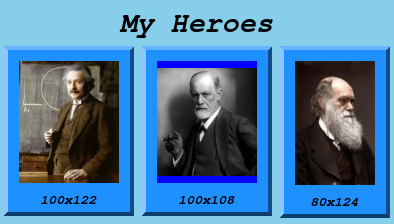
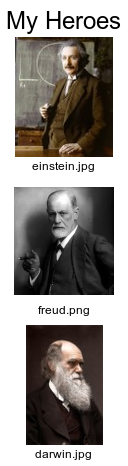
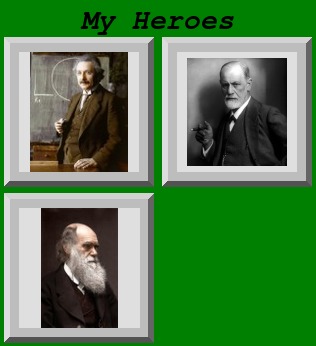
The montage command can also be used to modify, label and combine photos. However, unlike convert, montage cannot create images. It is particularly useful at combining mxn arrays of photos with a single command. The option that does this is -tile mxn (aligns mn images into a single multi-image with n rows and m columns). The montage option list includes: -title, -pointwise, -background, -geometry, -label, -set label -tile, -bordercolor, -mattecolor, -frame. Examples using montage to label and enhance images follow.
In the examples above, we put in extra options just to illustrate what they do. There is no problem in leaving out any of the options except -tile. The image magick programs will simply substitute a default option, or just not enhance the final photo with that option. See heros1.png above for a combination with few extra options, namely just -set label '%f' and -title 'My Heros'. Notice that -set label '%f' is programmed to center the image name at the bottom of the image, and -set label '%wx%h' centers the image dimensions at the bottom of the image. The option -title ' ' always centers the chosen title at the top.
The command generally used for batch processing is mogrify. Mogrify accepts the same options as convert but the command structure is formulated in terms of formats (.png, .jpg, ...) instead of actual image names. The general template is:
mogrify [options] -format outputformat *.inputformat .
The following illustrates its useage to resize all the images of a particular type in a given folder:
mogrify -resize axb! -format jpg *.png resizes all .png to axb size and saves as .jpg
mogrify -resize axb -format bmp *.png resizes, preserving a/b ratio, all .png to cxd size, where either c=a or d=b and saves as .bmp.
Leaving out the -format stipulation will replace the original images with the resized image in .png format.
Templates for cropping images are the following:
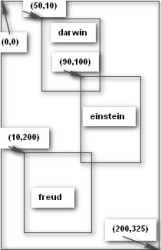
convert imput -crop axb+x+y output
mogrify -crop axb+x+y -format outputformat *.inputformat,
where axb is the size of the cropped image and (x,y) is the cordinates of the top left corner of the cropped image relative to the corresponding corner of the uncropped image (y positive downward).
Using mogrify -crop axb+x+y *.jpg will crop all the jpg images in the directory, replacing each original with its cropped version.
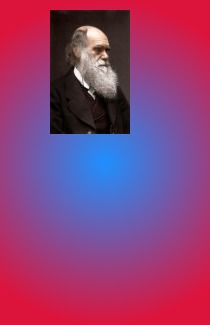
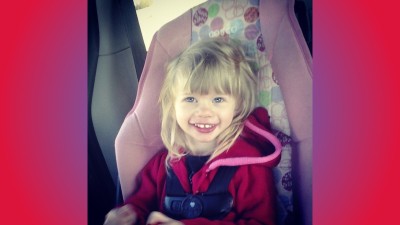 Audree3 |
 convert audree3.jpg -alpha Set -background LightCoral -vignette 0x3+0+0 audree7.jpg |
 convert audree3.jpg -alpha Set -background none -vignette 0x0+0+50 audree10.jpg |
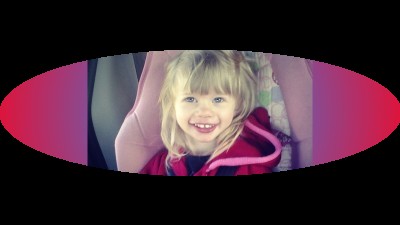
We will finish this introduction to Image Magick with a few words about the -vignette option, which I use a lot. The vignette option sets an image in an elliptical container within a rectangular background and produces a rolloff effect (gradual merging (blurring) of the background and image along the boundary of the ellipse). The general template is
convert input -alpha Set -background ? -vignette axb+x+y output.
Here, "?" is any of the hundreds of colors recognized by ImageMagick or none, a is the depth (radius) of the rolloff, b is related to the effect (sigma) of the blur, and x+y is related to the lengths of the axes of the ellipse. A value 0x0 will produce no rolloff, and to see the effect from other numbers, you will need to read the literature and/or experiment. The numbers x and y measure the percentage of decrease in the x- and y-axis of the ellipse relative to the corresponding dimensions of the rectangular image. Thus, +0+0 will make the ellipse the same size as the image. The default size of the ellipse is 80% if "+x+y" is left out of the command. Two examples, audree7 and audree10, applied to the image audree3, are on the right.
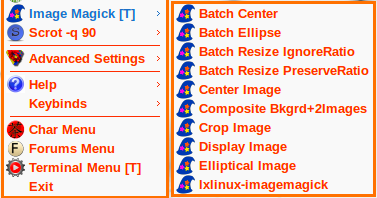
To help with the common every day edits, I use xdotool to put directly into the Obmenu (~/.config/obmenu-generator/schema.pl) about a dozen command templates as in Chart 1 below. This creates the menu shown in the image on the left. To use this Image Magick submenu, open a terminal in the directory with the relevant images, then click the menu entry, which will type into the terminal the words shown in Chart 1 for that command. You still need to complete the specific details like the names of the images and incomplete or unspecified format details. Click the return key and "bang!", there is the output in the same directory (unless you specify the output is to go elsewhere).